Selected Article
RHCSA Lab Environment Setup
Posted on: 2025-08-17, Updated on: 2025-08-19 03:08:01 | Read time: 11.7 minutes
Topic(s): unix/linux & information technology
I am currently studying for the RHCSA (Red Hat Certified System Administrator) exam, and I thought it would be useful to share the lab environment setup I've grown comfortable with during my preparation. As part of my studies I decided to make the switch from the Linux distribution I was daily driving, Slackware, to Fedora (currently Fedora 42). Fedora is a community-driven distribution that serves as the upstream development platform for RHEL (Red Hat Enterprise Linux). There were of course other reasons I made the switch, but to me it made sense to be using a desktop distro that is part of the same ecosystem.
To virtualize RHEL 9 on my Fedora 42 host, I am using QEMU/KVM and virt-manager. This guide assumes you are using the Fedora Linux distribution as well. The remainder of this article will present a guide for obtaining a similar setup.
Setting up libvirt and virt-manager
First you need to install the libvirt library in order to support platform virtualization using KVM. KVM requires either the Intel VT or AMD-V CPU virtualization extensions depending on which CPU you have. To check for this support you can run the following command:
$ grep -E '^flags.*(vmx|svm)' /proc/cpuinfo
If no result is printed for the above command, it is possible that the CPU virtualization extension is turned off in your computer's BIOS. There is also the possibility that your system just doesn't support hardware virtualization, in which case you will be forced to use the slower software virtualization.
Next, you can install the necessary virtualization software using Fedora's virtualization package group.
To view an overview of the package group, run the following command:
$ dnf group info virtualization
NOTE: If you are curious as to why you can't see the
virtualizationpackage group withdnf group list, you will need to use the--hiddenflag (dnf group list --hidden | grep virtualization).
To install the virtualization package group:
$ sudo dnf install @virtualization
$ # Use the following command if you know you need the optional packages:
$ sudo dnf group install --with-optional virtualization
After the packages have been installed, you can enable and immediately start the libvirtd Systemd service:
$ sudo systemctl enable --now libvirtd
If upon running the following command, you see kvm_intel or kvm_amd, you will know that the KVM kernel modules are properly loaded and configured:
$ lsmod | grep kvm
One final task that will make your time using virt-manager and KVM virtual machines much easier is adding your user account to the libvirt group. If you are not a member of the libvirt group or the root user, you will be prompted for a password frequently when managing virtual machines. The libvirt group should already exist on your system now that you've installed libvirt.
You can add your user account to the libvirt group with the following command (the $(whoami) command substitution will expand to your currently logged in user):
$ sudo usermod -aG libvirt $(whoami)
Obtaining a RHEL 9 Installation ISO
Before you install RHEL 9, you need to obtain a installation ISO image. Thankfully, you can do this and use RHEL for free with the Red Hat Developers Program with a few limitations. This is a great opportunity if you want to develop on RHEL or study for Red Hat certifications like the RHCSA.
To get started, visit https://developers.redhat.com/ and create an account at https://developers.redhat.com/register. After creating your free account and logging in, visit https://developers.redhat.com/products/rhel/download and scroll to the bottom of the webpage.
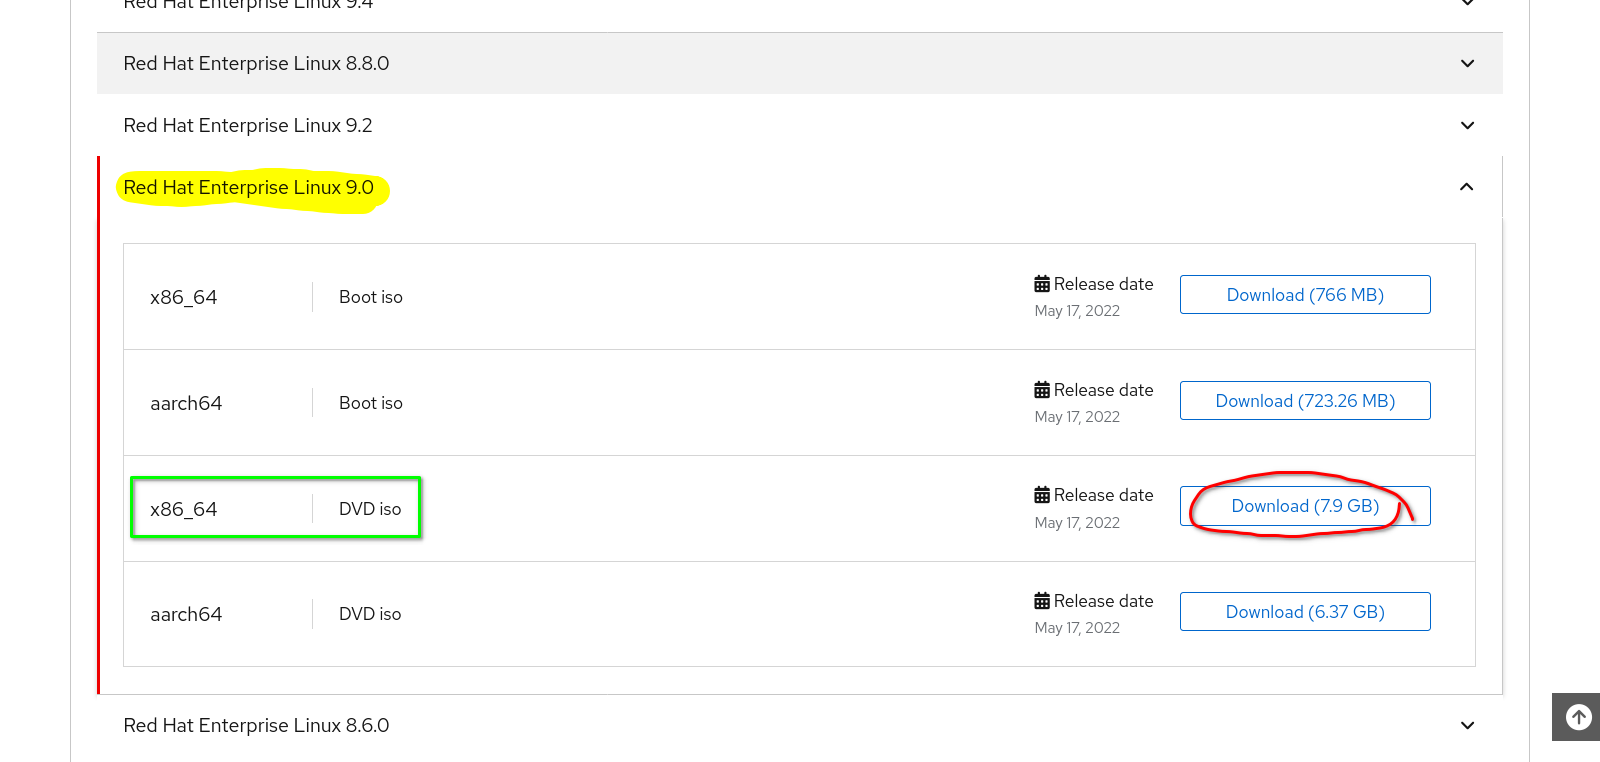
When you reach the All Downloads section expand the Red Hat Enterprise Linux 9.0 item and download the x8664 DVD iso (it will be around 7.9GB in size). Take note of the release number and ensure you're downloading RHEL 9.0, since this version most closely matches the exam environment.
Creating a RHEL 9 Guest Virtual Machine
There are different ways to create a virtual machine, but for the sake of ease we will simply use virt-manager. virt-manager provides an easy-to-use graphical user interface that you can use to manage your virtual machines. To start manager run virt-manager or search for it in your desktop environment's application menu.
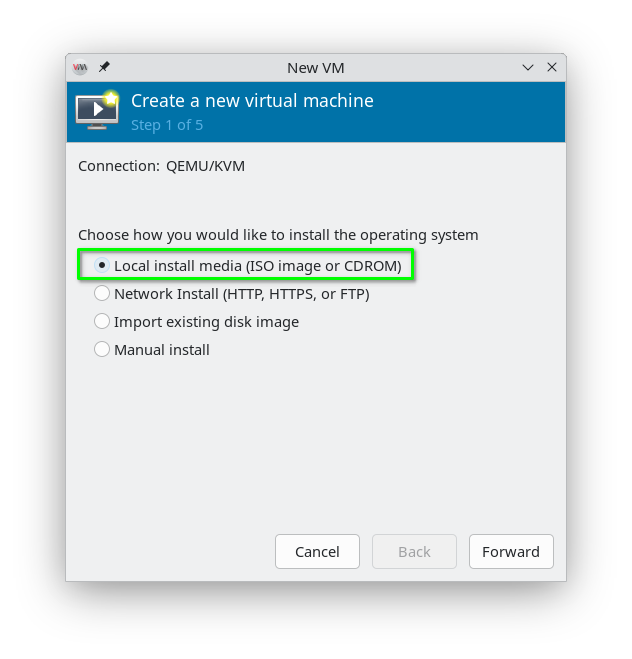
When virt-manager opens, click File -> New Virtual Machine. The menu should show Connection: QEMU/KVM. For the “Choose how you would like to install the operating system” prompt, choose the “Local install media (ISO image or CDROM)” radio button and click Forward.
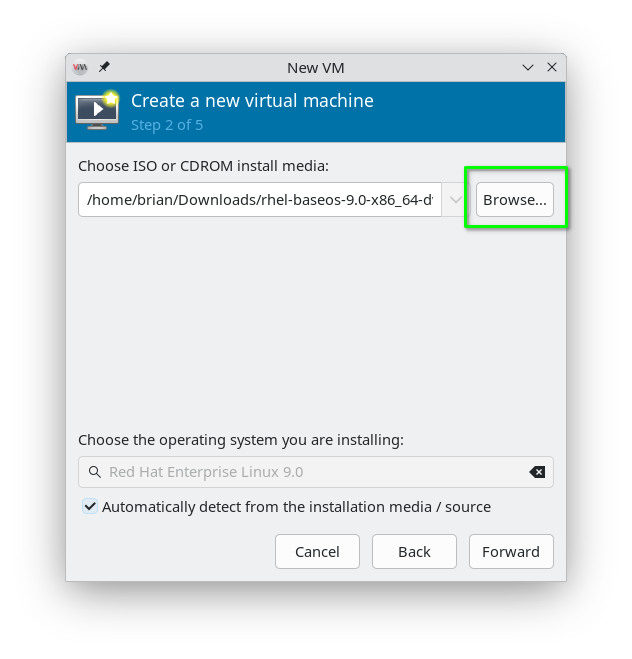
For the “Choose ISO or CDROM install media:” prompt, click Browse… to open a file dialog. The “Local ISO media volume” menu that pops up next can be somewhat confusing. Just click Browse Local and navigate to wherever you downloaded the RHEL 9.0 installation ISO file. It will most likely be named rhel-baseos-9.0-x86_64-dvd.iso. Choose the file and virt-manager will most likely auto-detect that you are trying to install RHEL 9.0. Click Forward to move on.
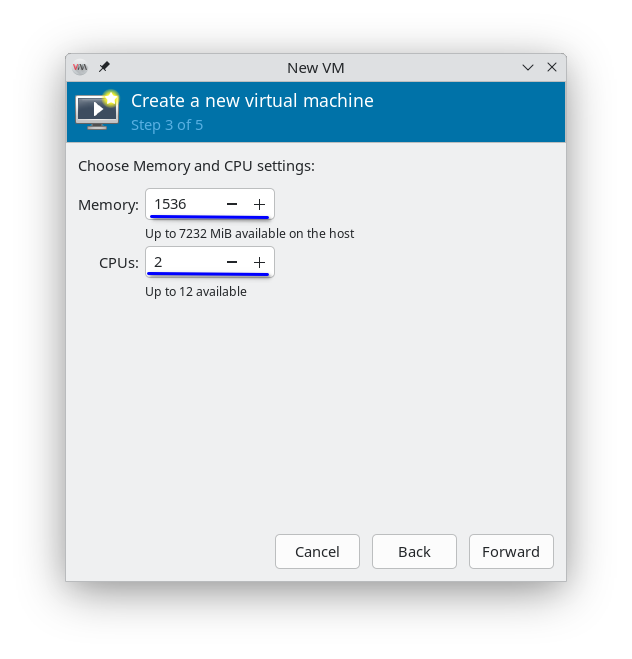
In the next screen you are given options to choose the amount of memory (in MiB) and CPUs to dedicate to the guest virtual machine. The CPUs option determines how many CPU threads on your host machine will be available to the VM. The defaults that virt-manager comes up with work well enough on my machine. You shouldn't need more than two guest VMs to complete any given RHCSA lab, so you can safely allocate more resources per VM if your host allows. To continue, click Forward.
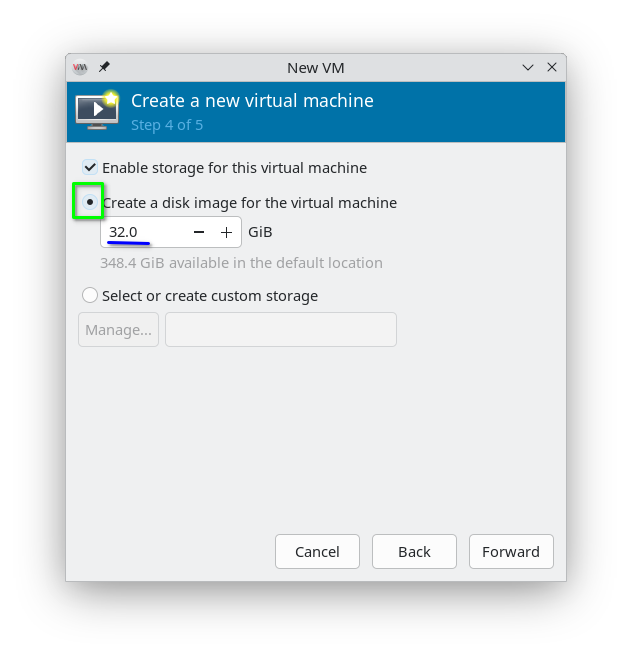
Next up is creating a virtual disk image for your guest VM. Some resources recommend you use as much as 40-GiB for your virtual disk, however I went with 32-GiB and have not exceeded more than 8% disk usage on my guest VM's root partition. You may be able to get away with using just 20-GiB for your virtual disk. After entering your desired storage amount click Forward.
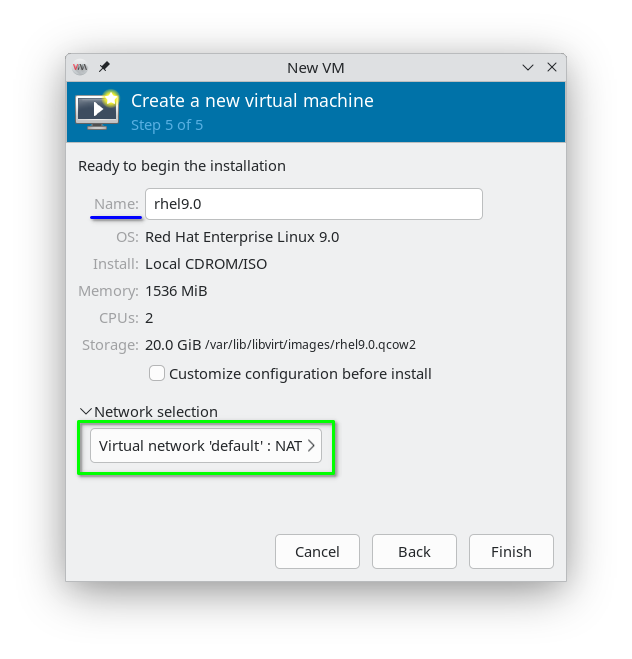
In the final configuration screen, you are given the option to set the name of your virtual machine and select the type of network it will use. The default network type of NAT will suffice. You can set the name to something meaningful like rhel9_server1. Click Finish will finalize the configuration, create the virtual disk, and immediately boot from the RHEL 9.0 installation disk.
Installing RHEL 9 in the Guest VM
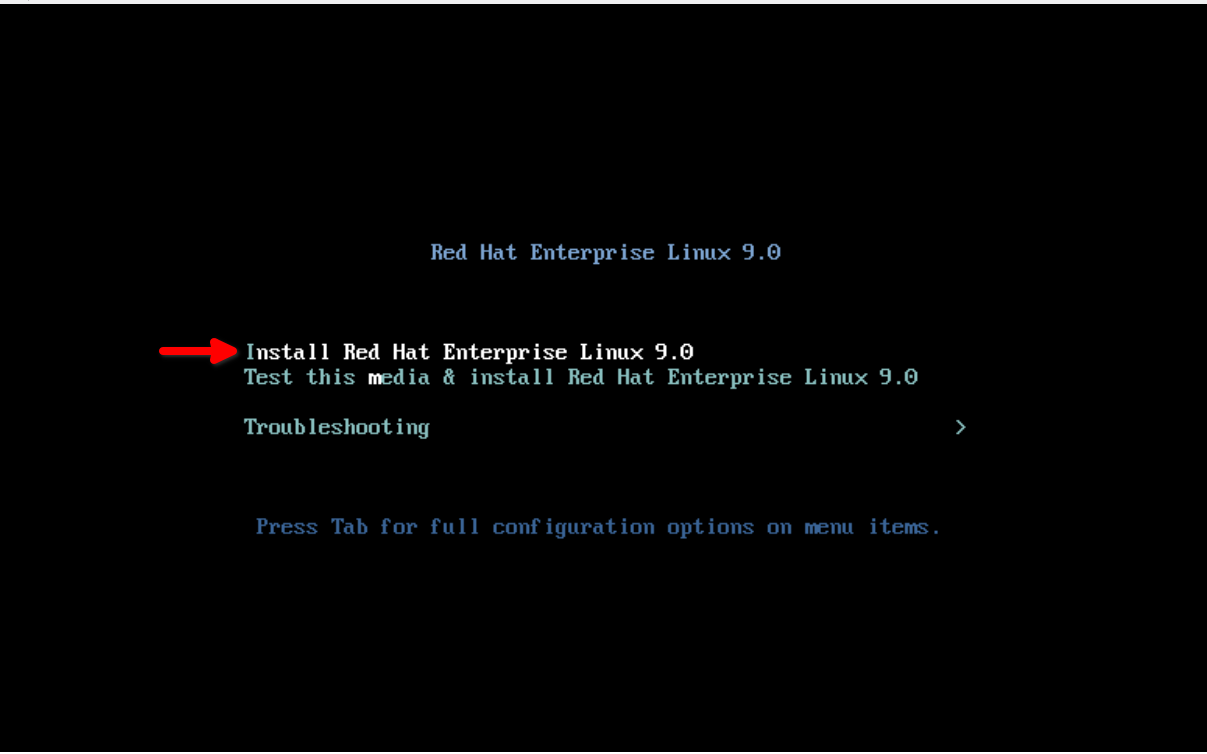
When the VM starts, you will be greeted with a menu from the RHEL 9.0 installation disk. Use the up and down arrow keys to select “Install Red Hat Enterprise Linux 9.0” and press Enter on your keyboard.
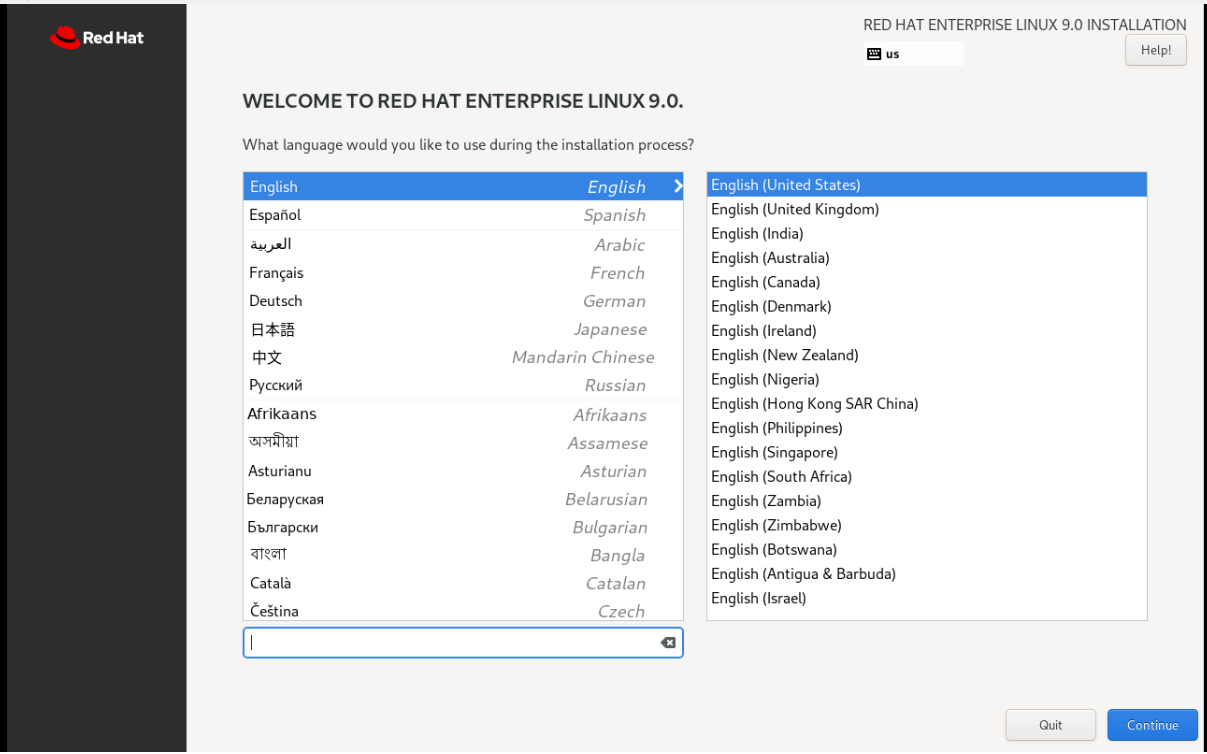
Next a graphical welcome menu will show and prompt you for your preferred language to use in the installer. Select your preferred entry and click Continue. This only affects the installer interface language, not the language used by your installed system.
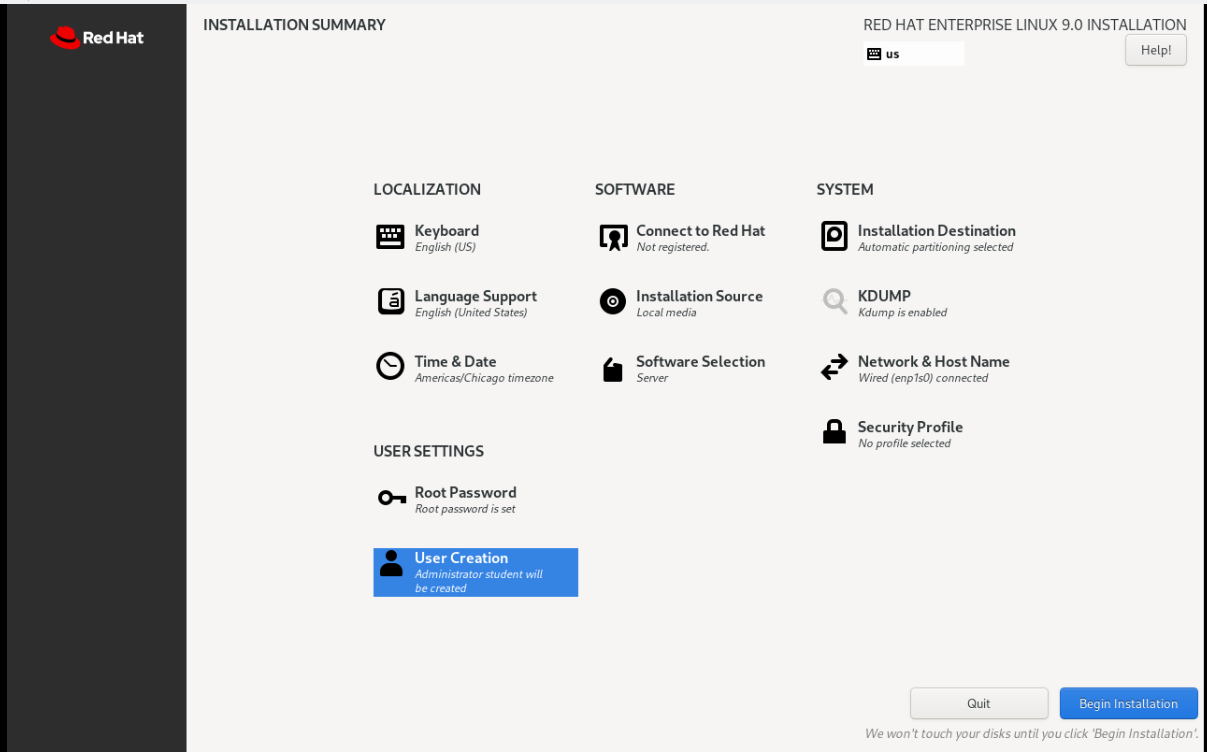
You will then be presented with the main “Installation Summary” menu which provides all of the items that can be customized before installation. Confirm that the timezone shown under the “Time & Date” entry of the “Localization” section is correct. Confirm that the Installation Source under the “Software” section is set to local media.
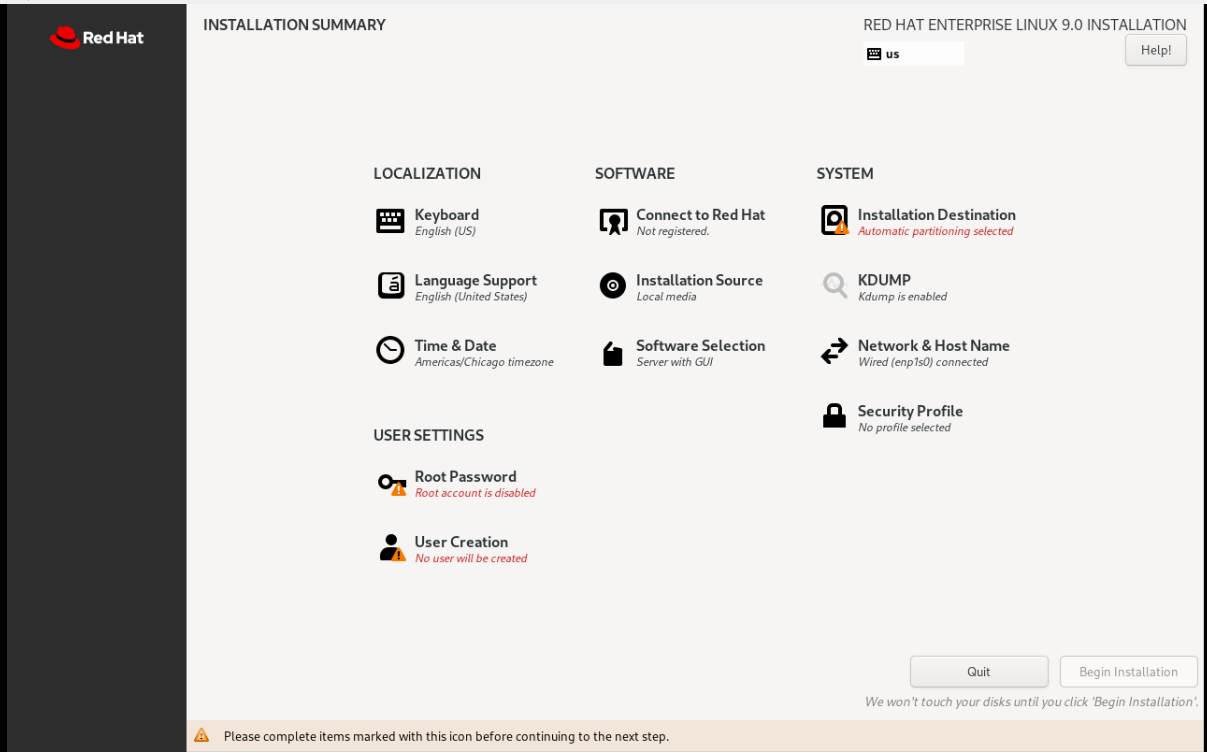
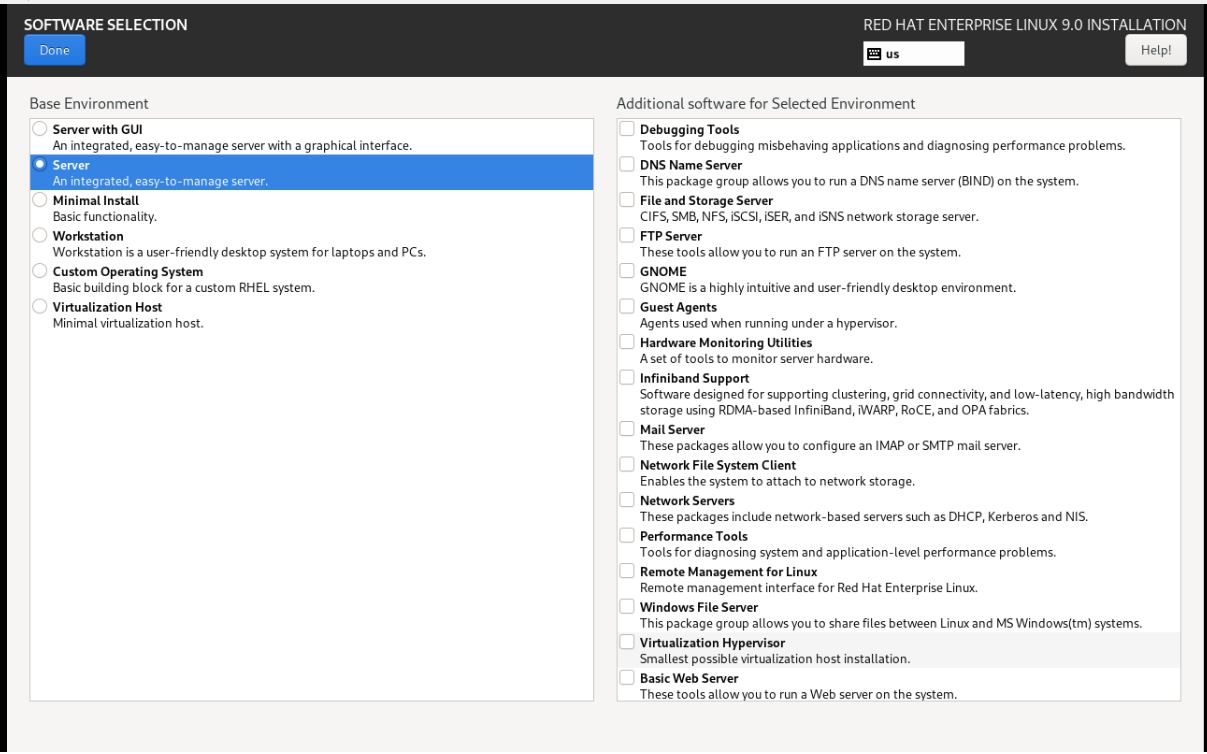
Next click the “Software Selection” entry under the “Software” section. By default the base environment will probably be set to Server with GUI. I prefer to use the Server environment since it is fairly lean and light on system resources. Some learning resources will recommend the Server with GUI base environment, so you can use multiple terminal sessions. However, you can achieve the same thing with Server using serial consoles, SSH sessions, or tmux and GNU screen installed from the installation disc. On the actual exam, you will have access to a GUI but you will mostly accessing your VMs over SSH. For the “Additional software for Selected Environment” items, it is fine if you select nothing. Now click Done.
Next click the “Installation Destination” entry under the “SYSTEM” section. For this menu, you simply need to select your virtual disk which will probably be named “vda.” Ensure that Storage Configuration is set to Automatic. Now you can click Done to move on.

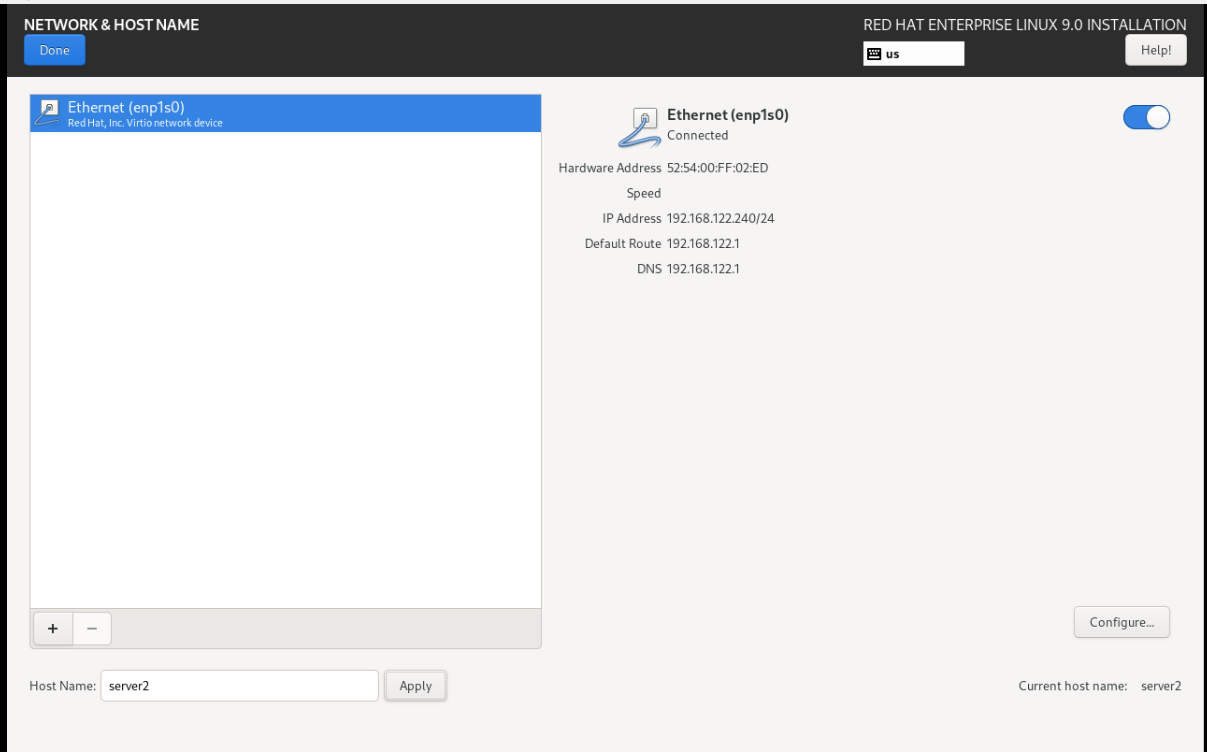
Next click the “Network & Host Name” entry under the “System” section. The defaults here will suffice, but you may wish to change the system's host name. I set mine to server2.example.com, since I was creating an additional RHEL 9.0 lab VM.
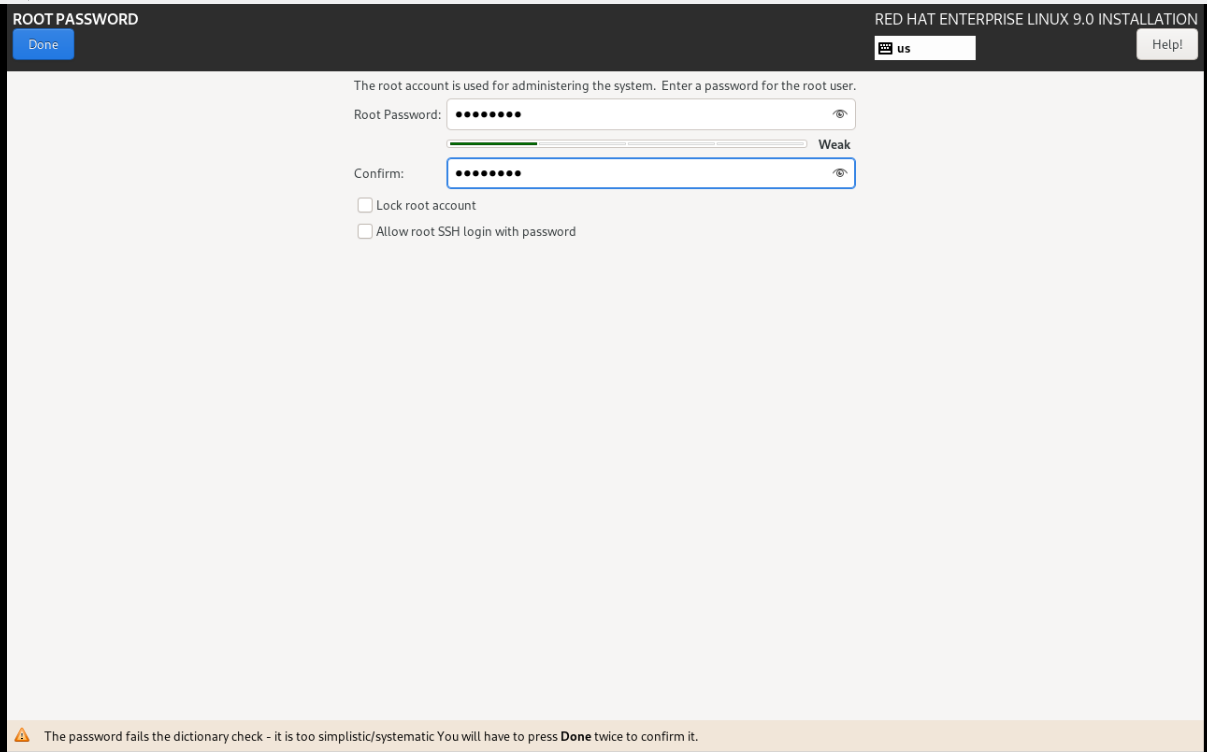
Next click “Root Password” under the “User Settings” section. Ensure Lock root account is unchecked. You will need to use the root account plenty during the course of your studies, thus it makes sense to be able to login as root directly. If your password fails a dictionary check, in other words it is considered weak by the installer, you will have to click Done twice before moving on.
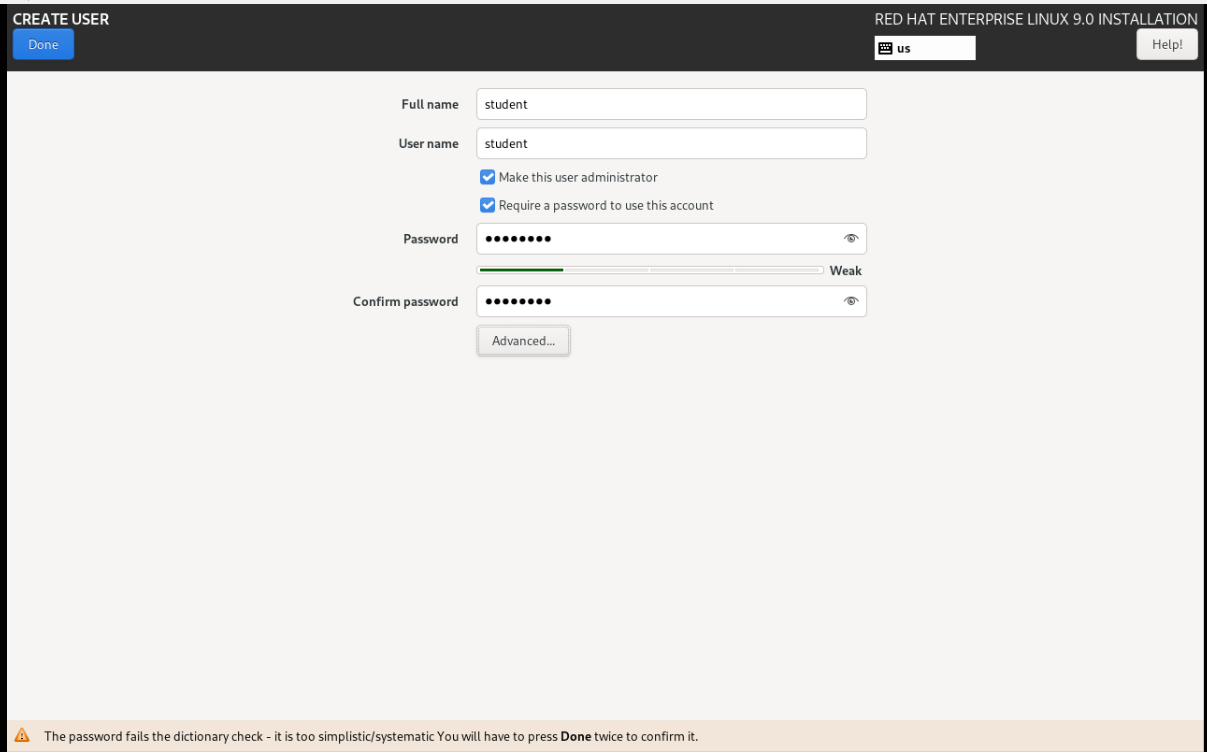
Next click “User Creation” under the “User Settings” section. Choose a username for your primary user account. As you can see, I have chosen “student”. What you enter for Full name isn't important, so you can leave it identical to your User name. Ensure that Make this user administrator is checked. As is the case with the root password menu, if you enter a weak password, you will have to click Done twice.
Notice that we ignored the “Connect to RedHat” entry under the “System” section. For lab purposes, you don't need to register your VM with Red Hat at this point. Registration can be done later if you want to access Red Hat-hosted repositories, but for practice you can work with the included installation media or create your local own repositories.
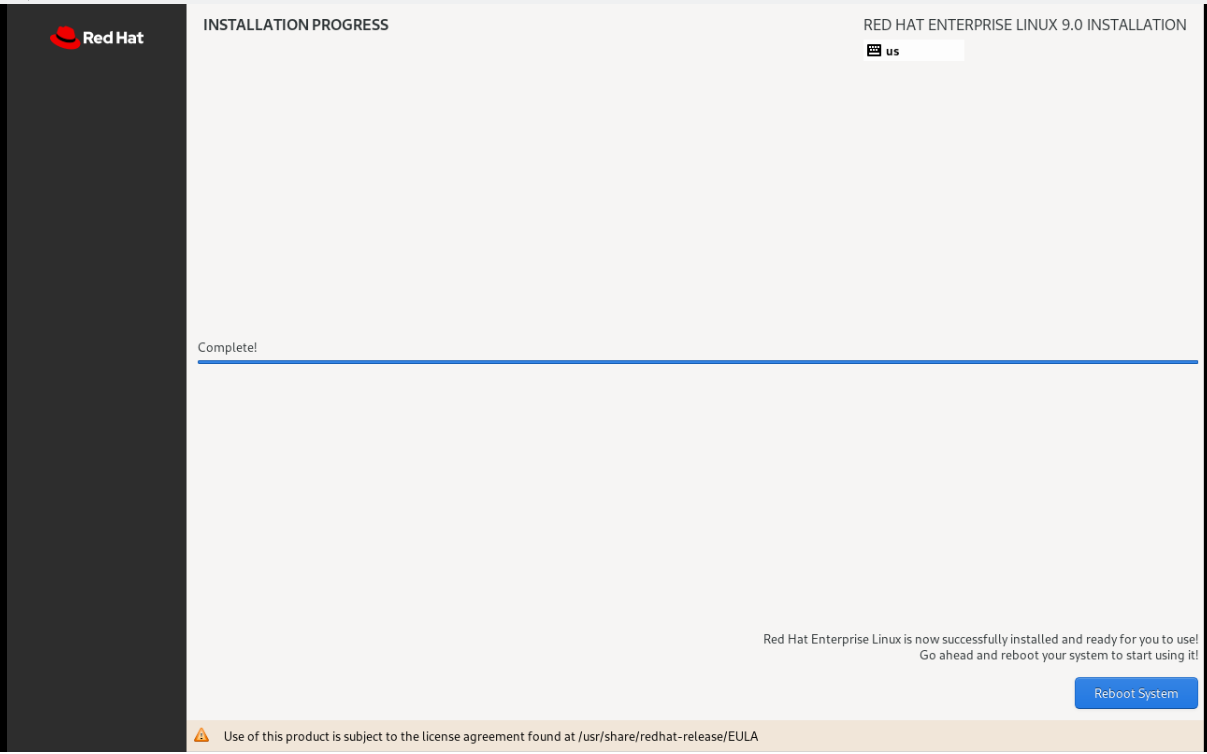
You can now begin the installation process from the main “INSTALLATION SUMMARY” menu by clicking Begin Installation. The “INSTALLATION PROGRESS” menu will show you the steps taken by the installer when installing RHEL 9.0. Eventually you will be prompted to restart your system by clicking Reboot System.
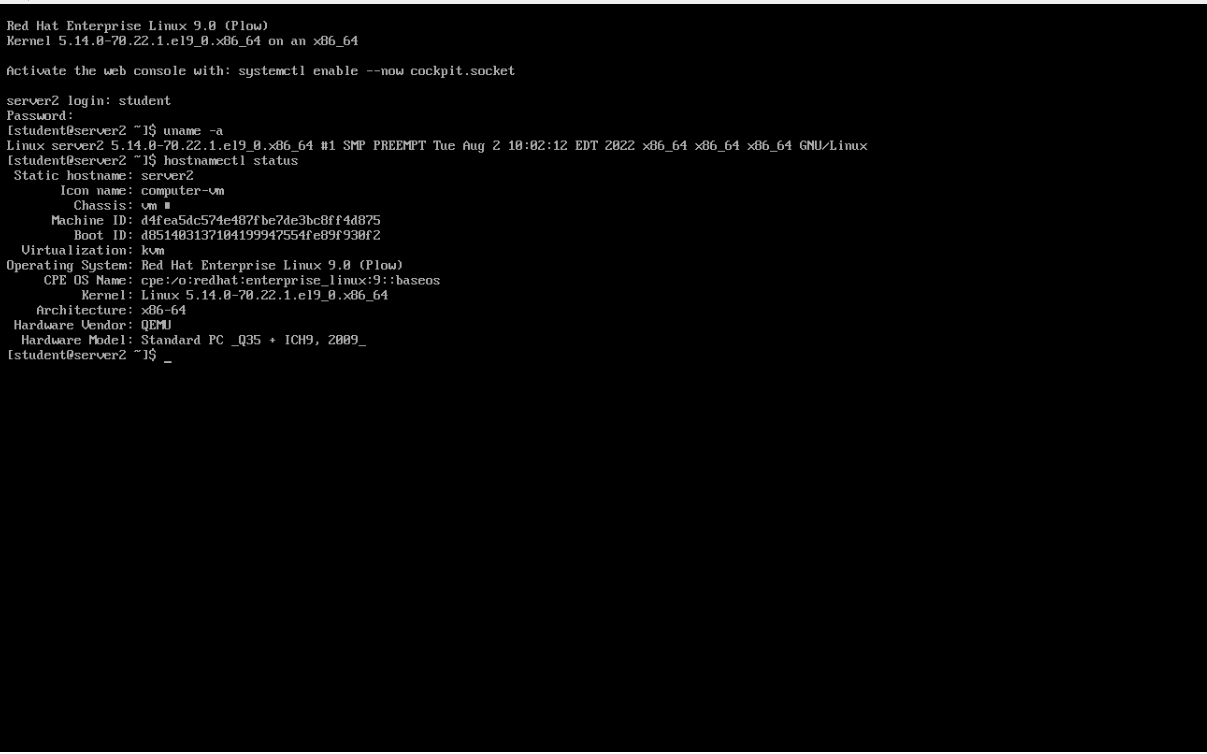
After restarting your system, you will be presented with a login prompt where you can enter “student” or whichever username you chose followed by your password.
Extra Tips for Labs
During your studies, you will often need to make small adjustments to your guest VMs. For example, you may need to mount an ISO image file for managing repositories, or attach extra virtual disks in order to practice storage management tasks. This section covers a few practical tips that will come in handy.
Accessing the Guest VM from a Serial Console and SSH
Instead of using the graphical console in virt-manager, I prefer to access my lab virtual machines directly from my desktop environment's terminal (Konsole, GNOME Terminal, etc.) using either a serial console or SSH. The graphical console in virt-manager can be clunky – it is hard to resize, and the fonts are often difficult to read.
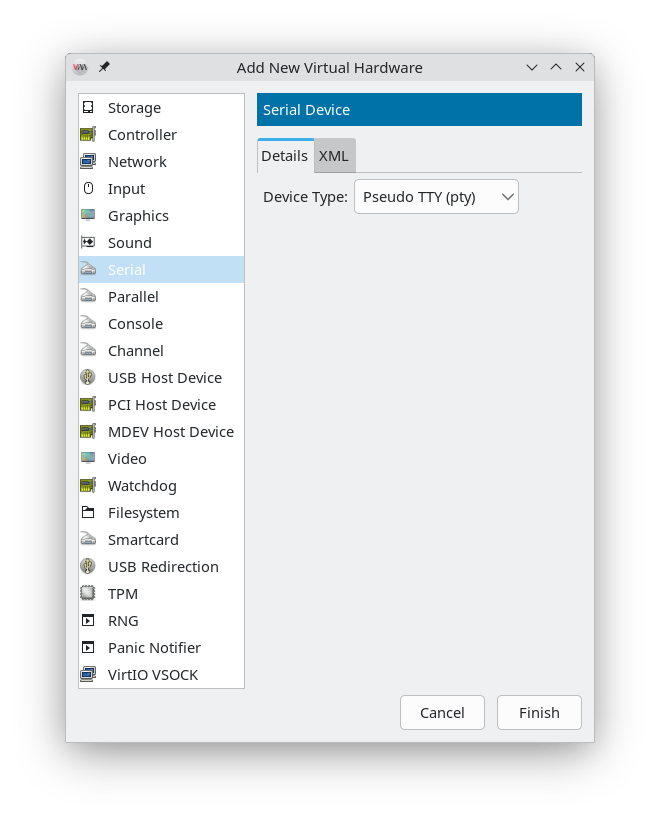
As part of setting up a serial console for our RHEL 9 guest VM, we first need to ensure that our VM has a Serial hardware type available under the “Show virtual hardware details” menu. If you don't see a device in the left pane with a name such as Serial 1, click Add Hardware and choose Serial from the “Add New Virtual Hardware” menu. Ensure that the Device Type is set to “Pseudo TTY (pty)” and click Finish.
To enable a serial console on RHEL 9, you need to ensure the kernel boot line includes serial console options. Edit the GRUB configuration by appending the following parameters to the GRUB_CMDLINE_LINUX variable in /etc/default/grub (don't enter the dots shown, they simply represent other parameters that might already be set):
# Other settings...
GRUB_CMDLINE_LINUX="... console=ttyS0,115200n8 console=tty0"
# Other settings...
NOTE: If the contents of your
GRUB_CMDLINE_LINUXsetting are different, simply add these additional boot parameters at the end of the string. You can read more about kernel boot parameters withman 7 bootparam.
After making the changes, run sudo grub2-mkconfig -o /boot/grub/grub.cfg and reboot the system for the settings to take effect.
You can then connect to the VM's serial console using the virsh command-line tool for libvirt:
$ virsh list --all
$ virsh start rhel9_server   # Replace 'rhel9_server' with the name of your VM
$ virsh console rhel9_server
One drawback of the serial console is that you may need to manually specify the character dimensions of the console. First, open a new tab in your GUI terminal (Konsole, GNOME Terminal, etc.) and run the command stty -a | head -n 1. Take note of the number of rows and columns and switch back to the terminal where the serial console is active. You can run the following command to set the proper console dimensions at login for your user:
$ # Replace <ROWS> and <COLS> with the appropriate numbers you found earlier
$ echo 'stty rows <ROWS> cols <COLS> >> ~/.bash_profile
To exit the console, use the key combination Ctrl+].
If you run into trouble managing or listing your VMs with virsh (for example, virsh list --all returns nothing), you may need to set the libvirt URI explicitly:
$ echo 'export LIBVIRT_DEFAULT_URI=qemu:///system' >> ~/.bashrc
$ source ~/.bashrc
Alternatively, once your VM is running and networked, you can log in via SSH, which is often the most convenient way to work with your lab machines. To find the appropriate IP address to use with the ssh command, run ip addr show | grep inet | grep -v inet6, and choose the first Class C private IPv4 address you see.
Conclusion
Setting up a proper lab environment is the best way to prepare for the RHCSA exam. By running RHEL 9 in a virtualized environment, you can replicate the exam experience closely and learn the exam topics effectively. Thanks for reading, and good luck in your RHCSA studies!
Resources:
- Red Hat Certified System Administrator
- Red Hat Certified System Administrator exam | EX200
- Virtualization – Getting Started (Fedora Docs)
- Virtual Machine Manager
- libvirt: The virtualization API
- KVM
- Red Hat Developers | Red Hat Developer
- Download Red Hat Enterprise Linux at no cost | Red Hat Developer
- Red Hat Enterprise Linux operating system
- Fedora Linux | The Fedora Project
- Use virt-manager as a non-root user on Linux | ComputingForGeeks